Physical Address
304 North Cardinal St.
Dorchester Center, MA 02124
Physical Address
304 North Cardinal St.
Dorchester Center, MA 02124

Chances are that if a VPN is marketed to everyday users, it more or less runs itself. As long as you go with one of the best VPNs instead of setting up your own manual connection, the interface is likely built so you have to engage with it as little as possible. Generally, if you find yourself constantly thinking about your VPN while using it — as happened to me with Norton VPN — that's a bad thing and you should change providers.
That said, it's still useful to get a high-level view of how to use a VPN, especially if you've never used one before. In this article, I'll walk you through how to download, install and configure a VPN on any platform and how to choose servers for specific situations. I'll also discuss specific steps for desktop and laptop computers, phones, tablets, smart TVs, game consoles and routers.
There are over 100 VPNs available on the internet and the two big mobile app stores, but most of them follow a similar approach to download and installation. Except for certain free VPNs, you'll need to create an account on the VPN provider's website, install the VPN client, then use your account to log in. Here are the steps.
In a web browser, navigate to a VPN provider's website. For suggestions on where to start, check out our list of the best VPN deals. Click any link that mentions getting the VPN or claiming the deal — as a rule, they aren't hard to find.
Select a plan based on the length of time you need the VPN for, the features you want and the number of devices you'd like to use the VPN on simultaneously. Add a payment method. You'll be prompted to create the username and password for a new account.
On desktop, you can start with the Mac or Windows app store, though some VPNs require a download directly from their respective website. That’s generally the way to get the most feature-rich version of the VPN, but just make sure you’re downloading from the provider’s website to ensure you don’t get a malicious copycat. On mobile, the app store is your only choice, but don't forget to check the reviews and make sure you're getting the service you paid for — unfortunately, rival (and sometimes less scrupulous) VPN brands can use paid placements to appear higher on search results, even for a rival product.
Follow the pre-programmed installation flow. Again, don't let a VPN make any changes to your system if you haven't thoroughly vetted the provider (or gone with one of our recommendations). If it's safe, allow the VPN all the setup permissions it needs.
Finally, open the VPN client and sign in with the credentials you created in step two. You're now ready to start using your new VPN.
With so many VPNs on the market, this process won't always be the same. Sometimes you'll have to make the account before paying, and some mobile VPNs let you handle the whole process in-app. What's always true, though, is that a good VPN will make the signup flow as easy as possible. If you have trouble before you even log in, that's a red flag.
Most VPNs are ready to go out of the box. However, even if you don't think you're a power user, it's a good idea to go through the settings and make sure they match what you need. Here are a few steps I recommend taking.
Activate the kill switch. This feature monitors your connection to the VPN server. If it ever drops — either from problems in the server, your client or somewhere in between — the kill switch instantly cuts off your internet until your VPN connection is restored. This saves you from accidentally broadcasting anything sensitive while also ensuring you only connect to legitimate VPN servers (avoiding the Tunnelvision bug).
Set up favorites and profiles. VPNs usually let you select servers you'll use regularly, websites you'll often connect to through the VPN and other preferences that will appear immediately when you open the app. Some go further, like Proton VPN, which lets you create user profiles that bundle several preferences together.
Decide if you want the VPN to automatically launch and connect when you start up your computer.
Check on split tunneling. There may be cases where you want a certain app or site to work outside the VPN, or where you want everything to go unencrypted except one site or app. You can set up a split tunnel when you need it, but if there's one you know you'll use regularly, it helps to build it early.
Activate or deactivate any content blockers the VPN comes with, including ad blockers, malware detectors and parental controls, as you see fit.
Decide whether you want the VPN to send you notifications, and how.
Select a VPN protocol. It's almost always best to let the VPN choose for itself, but it's helpful to at least know where the protocol-switching option is. Occasionally, if one protocol isn't working, you can troubleshoot by selecting another.
You can do all this by digging into your VPN's preferences control panel. A gear seems to be the universal icon for that, but Mac users may also find it by picking "preferences" or "settings" from the menu bar. When you find the preferences menu, go through each tab in turn and make sure everything is the way you like it.
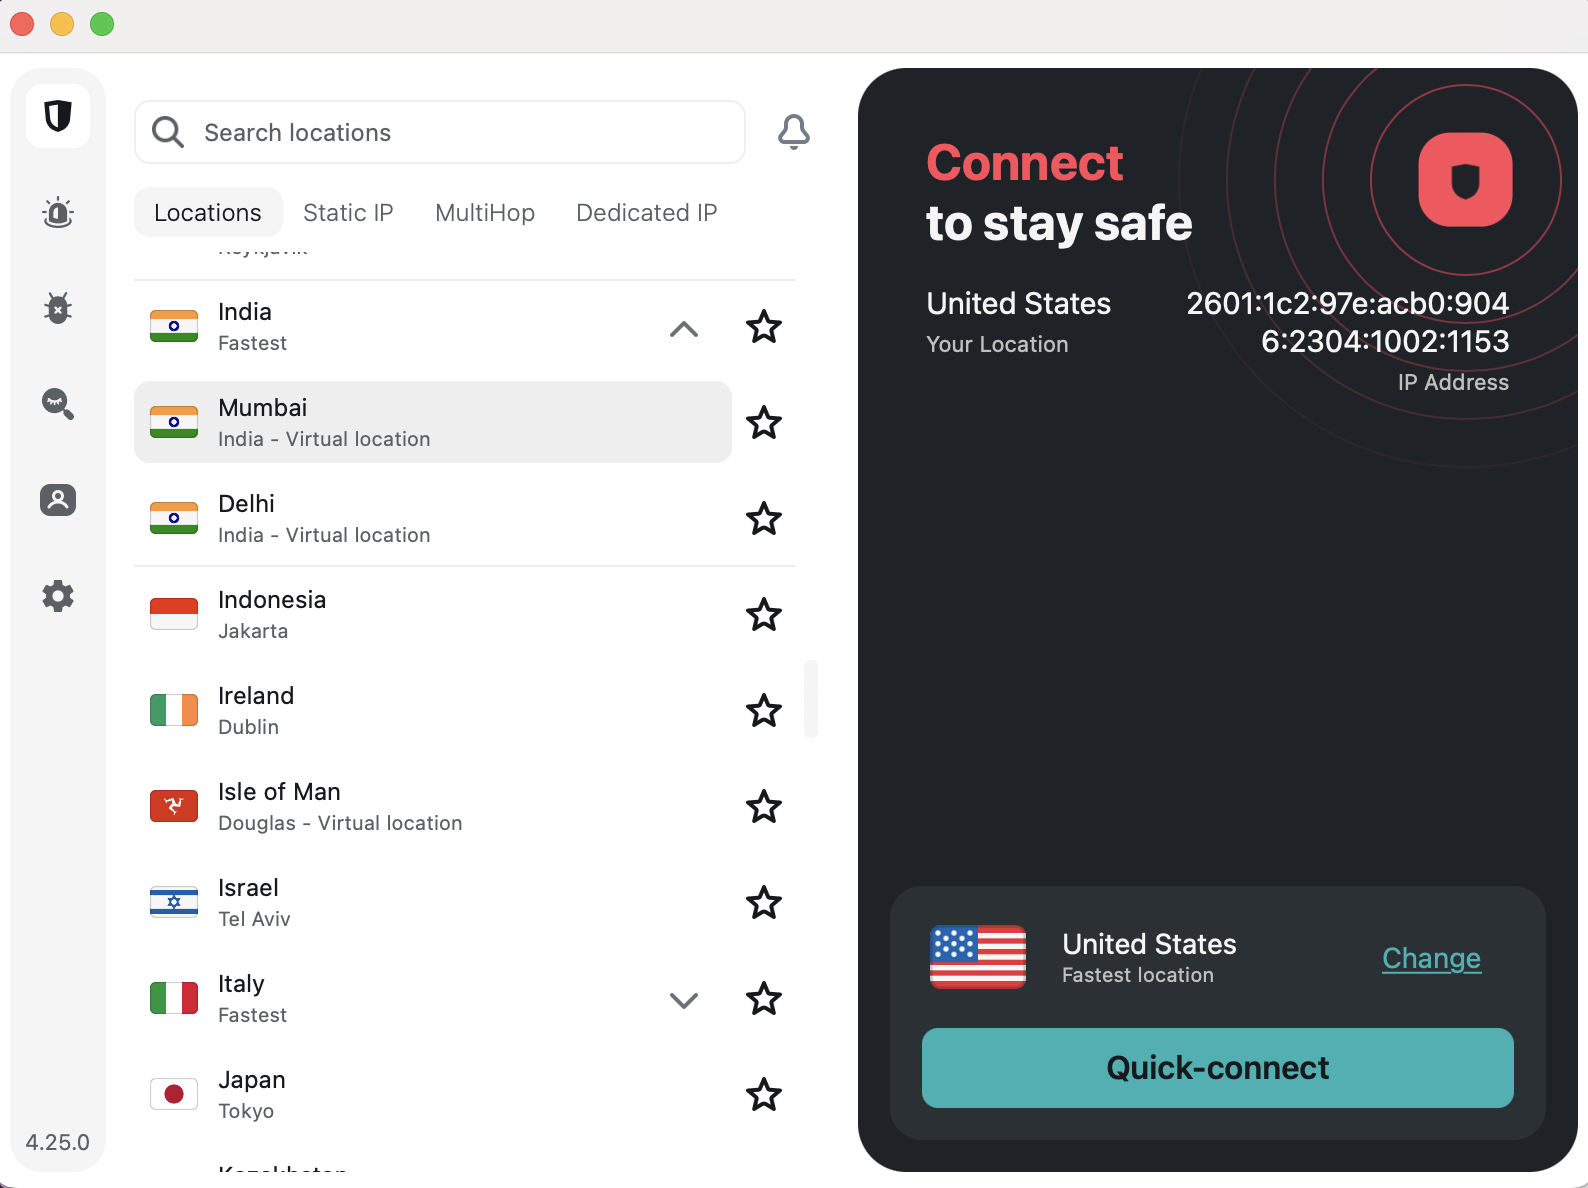
Picking a server location is the final box to check before connecting. You nearly always have the option of letting the VPN pick the best server. Most apps tend to determine the best server with a latency test, so it will almost always be a node very close to your physical location.
If you just want anonymity online, that's fine — it doesn't matter which IP address you use as long as it's not your real one. But several VPN use cases do require a specific server location. For those, follow one simple rule: Pick a server in the place you want your signal to come from.
For example, let's say you want to watch The Office, but you're only subscribed to Netflix and not Peacock. Luckily, Netflix is licensed to show The Office in the U.K. If you connect to a British server location before opening Netflix, you'll be able to access the show without paying for an extra subscription. (Of course, make sure VPNs aren’t expressly banned by the streaming service’s terms of service before accessing it while using one.)
Other than streaming, the most common reason you'll need a specific VPN server is to get around firewalls that block websites. Whether it's your school doing the censorship, your workplace or your entire state, the solution is the same: Pick a VPN server outside the restricted region. Censorship systems filter by location — they can't block where they don't have jurisdiction. Get a new virtual location and you should be free and clear. (Always be cognizant of the laws on VPN usage in your location before activating them.)
It's good to get into the habit of connecting to your VPN whenever you get online. You can never be sure what information your ISP is gathering on you. If you're using unprotected Wi-Fi, or a public network with a clearly visible password, anybody might be listening in. Even if you don't need a particular location, always be using your VPN.
The only reason you might want to be online without a VPN is that certain websites, especially online banks, get suspicious if they note repeated logins to the same account from too many different IP addresses. For those cases, you can either set up a split tunnel to exclude the website from encryption, or temporarily turn your VPN off altogether.
Although most VPNs try to keep their apps similar on every platform, the strictures of differing hardware and software lead them to install and operate differently. In case you still have questions after reading the general guide above, this section goes into detail on every platform where you might use a VPN.
After subscribing to a VPN on Windows, you should be directed to download an EXE file — if this doesn't happen, log into your account on the website and find the downloads center. Find the folder where the EXE is saved, double-click it and follow the onscreen instructions.
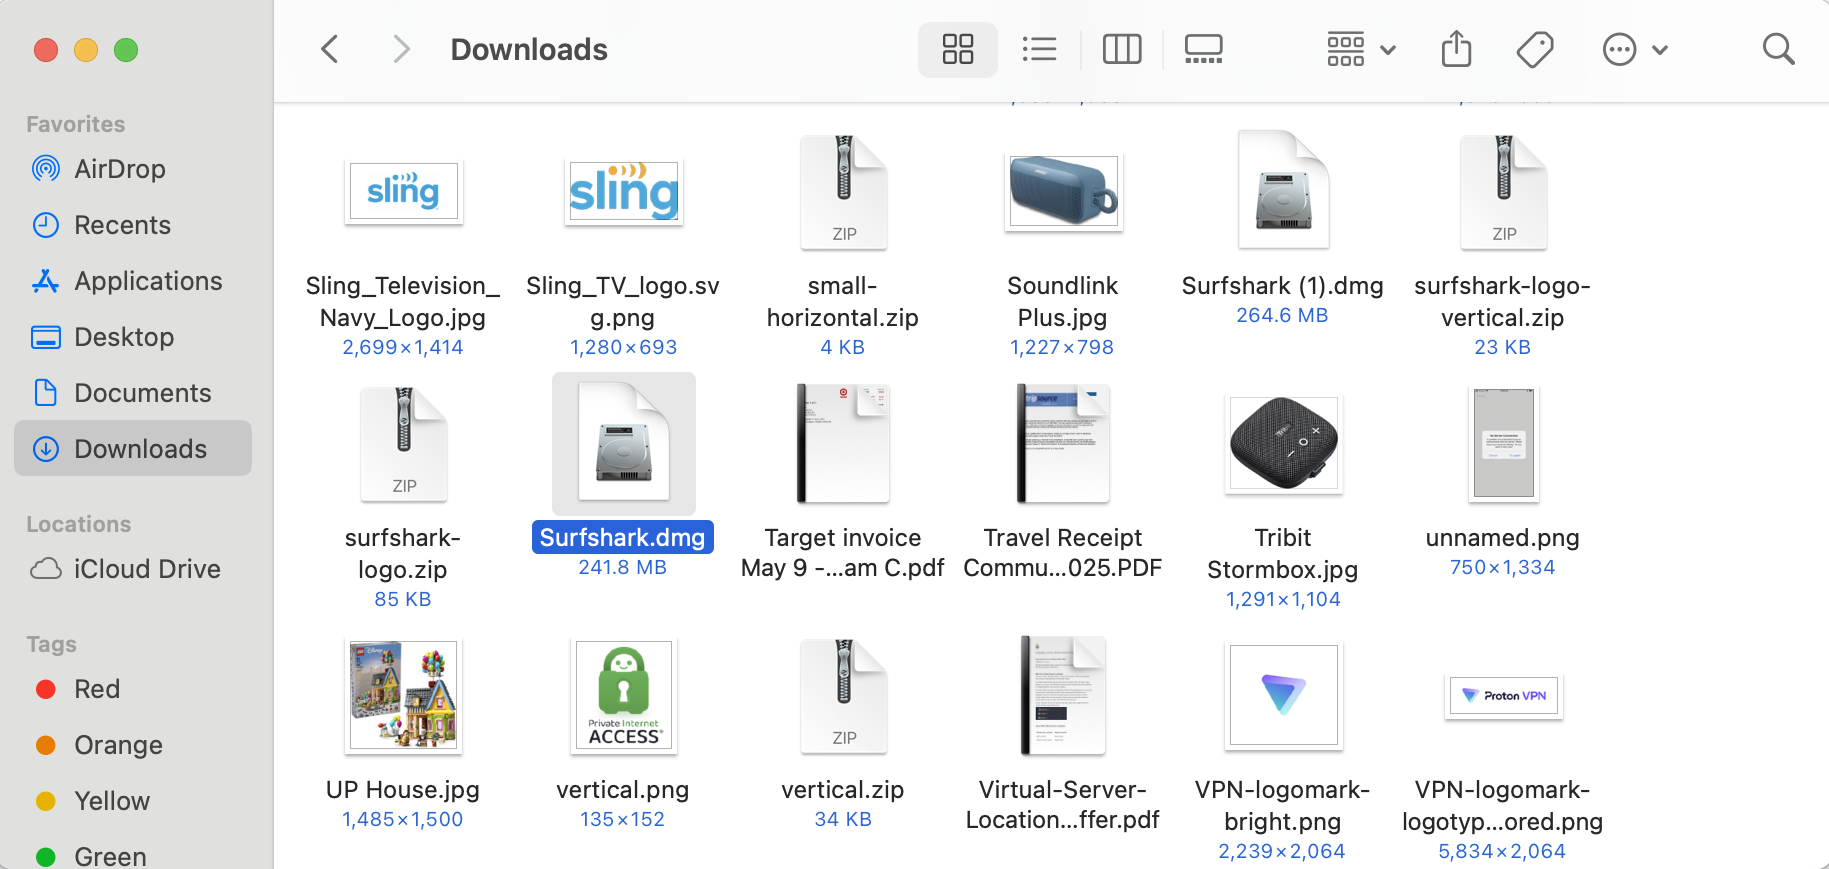
On Mac, the process is more or less the same, except you'll usually get a PKG file instead of an EXE. Go to your downloads folder (either in Finder or through your web browser) and double-click the PKG file. Grant the VPN whatever permissions it needs. (Again, this is why it’s important to only use a legitimate vendor, such as the ones we recommend.)
Once installed, you can open the VPN client at any time by double-clicking the icon again. Some VPNs open as separate windows, while others will add icons to your toolbar. This often varies by platform; if you're concerned that your VPN doesn't look like a screenshot you've seen, check which operating system the image comes from.
On Android and iOS, you'll download your VPN app through the Google Play Store or Apple App Store, respectively. Even if you get started through a mobile browser, it will probably redirect you to the app store for the actual download and installation.
Follow the usual step for downloading an app: search for its name in the app store, click "Get" or "Install," then let your phone cook. As always, so long as it's a vetted VPN, grant it the permissions it needs. You may be able to download and install the VPN first, then create your account and submit payment through the app afterward.
One final note: several leading VPNs offer free trials for mobile users. If you see a button that says something like "get free trial," you may be able to use the VPN for several days without paying. Just be warned that if the trial lapses, you might get automatically signed up for a plan that's longer than you'd like.
VPNs offer browser extensions as lightweight versions of their main clients. While a desktop or mobile VPN reroutes everything that device sends to the internet, a browser extension only protects traffic through your web browser. You can use one as a primitive form of split tunneling, but they're mainly for basic convenience — most of what you do online goes through a browser, so it's nice to be able to protect your connection without opening a separate app.
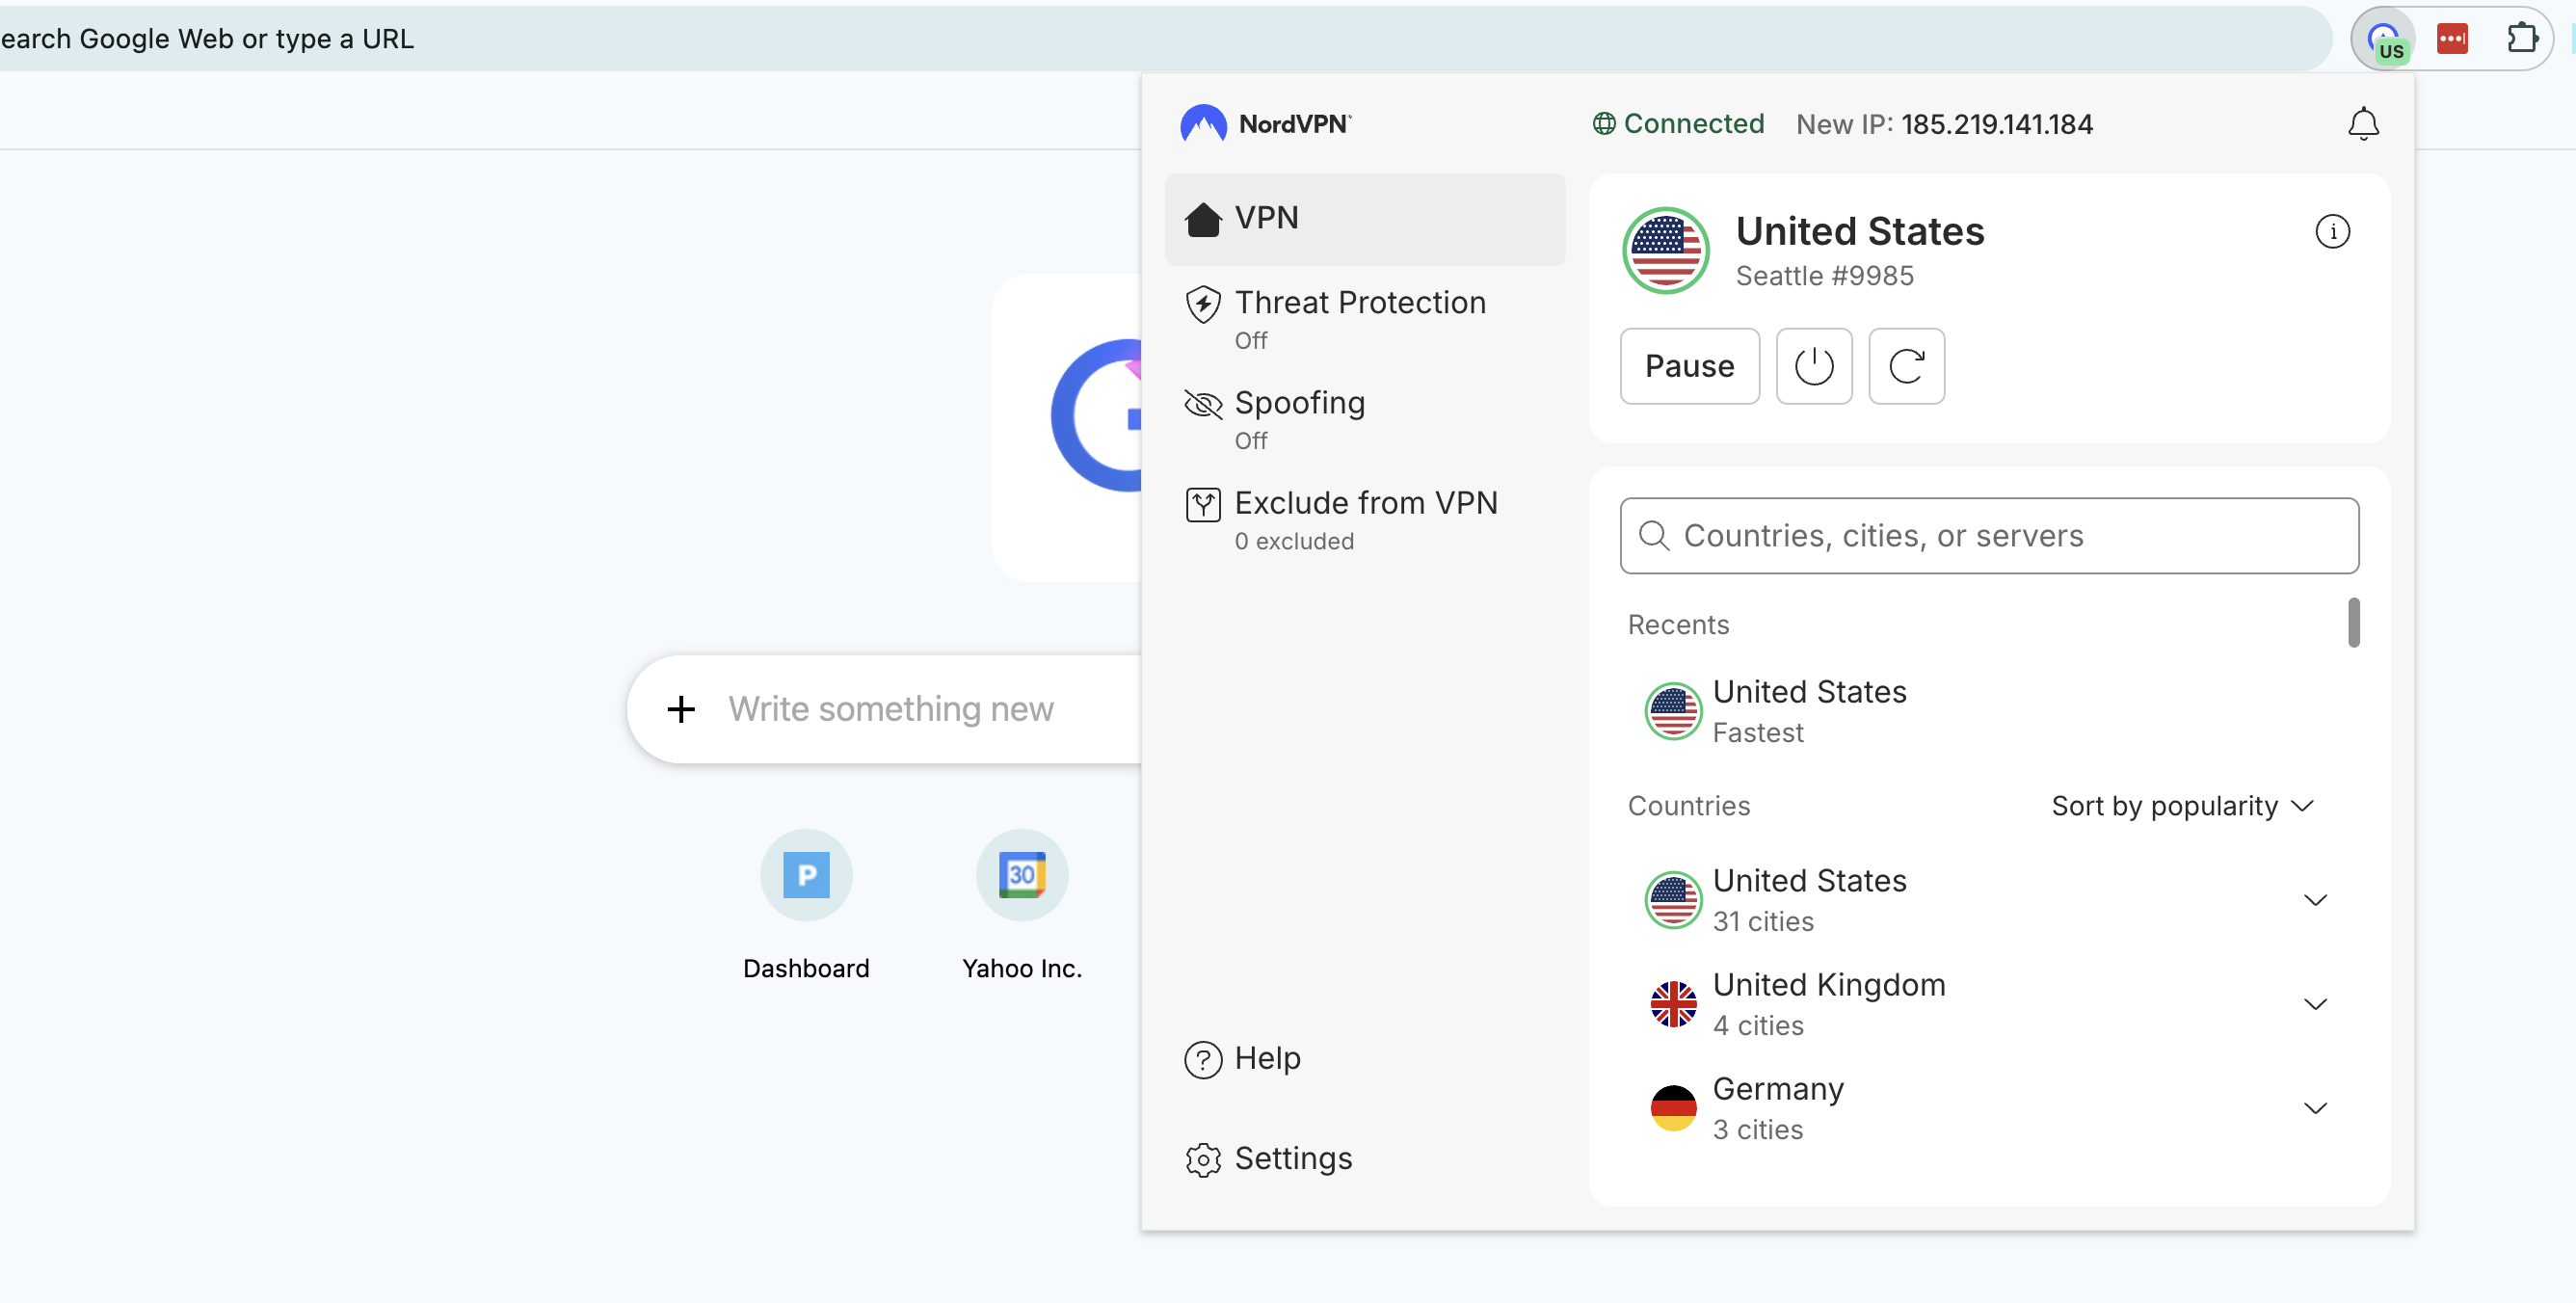
To use a VPN browser extension, just create your account as normal, then download the extension from your VPN's website. You can manage it from your browser's extensions center. That's a jigsaw piece at the top-right corner on most browsers, including Chrome, Edge and Firefox.
You can use a VPN to change your location and stream international content directly to a smart TV. The catch is that not all smart TV brands support VPN apps. For those that don't, you'll have to find a workaround.
The good news is that a ton of the best smart TVs can natively host VPNs, including Google TV, Android TV, Amazon Fire TV and Apple TV (though only tvOS 17 and above). To use a VPN on Android TV or Apple TV, go through the device's app store. On Fire TV, simply type the name of your chosen VPN provider into the search bar.
On smart TVs that don't have native VPN, like LG, Roku and Samsung, you have a few options. You can use a smart DNS feature like ExpressVPN's MediaStreamer to reroute smart TV traffic without full VPN encryption; the steps for this are different for every VPN, so check the provider's website. You can also install a VPN on your router (see below) so your smart TV automatically uses the router's location.
Finally, you can get a temporary fix by using your computer as a Wi-Fi hotspot while it has a VPN active. Follow the steps for your operating system.
On Windows:
In your system settings, go to "Network & Internet" and turn on the mobile hotspot.
Go to "Network & Sharing Center" and click "Change adapter settings."
Right-click the name of your VPN provider and go to "Properties," then "Sharing."
Check the boxes next to "Allow other network users to connect through this computer's internet connection" and "Allow other network users to control or disable the shared internet connection."
Click the "Home networking connection" dropdown and select "Microsoft Wi-Fi Direct Virtual Adapter."
Open your VPN client and connect to a server in your desired location.
On your smart TV, open the internet connections menu and select the name of your PC. Your TV is now online through the VPN server.
On Mac:
Open system settings and go to the "General" tab. Scroll down and click "Sharing."
Toggle "Internet Sharing" on, then click on "Configure."
Click the "Share your connection from" dropdown, then choose the VPN installed on the Mac. Under "To computers using," select "Wi-Fi."
Click on "Wi-Fi options" and enter a name and password for your hotspot network.
On your smart TV, connect to the network you just created.
Right now, there's no such thing as a game console with native VPN support. If you want to use a VPN while gaming — and I recommend that for safety if you're planning to play online — you can use two of the same methods that work for a smart TV: install a VPN on your router, or get your console online through a Mac or PC hotspot.
When you install a router VPN, anything that gets online through your home network will be protected, including game consoles, TVs and smart devices that don't support VPNs natively. It's not a process for the faint of heart, though. You'll need to get a new router and potentially install VPN firmware on it yourself. If you want to go this route, the easiest option is to get an ExpressVPN Aircove router — not only does it come with all the settings done for you, but it can be managed through the same clean interface as ExpressVPN's other apps.
We don't have space here to go through the entire process, but here's a general overview. First, get a router with firmware that supports VPN configurations — most ISP default routers don't, so you'll have to go third-party.
Next, go to the downloads center of your VPN's website and look for the section with VPN configurations. A "configuration" is a complete set of the information needed to access a certain VPN server through a certain protocol — say, a Proton VPN server in Arizona through OpenVPN. Download a configuration file for the protocol and location you want all your home devices to connect through.
Finally, open your router control panel by entering your router's IP address into a web browser address bar, then log in with your router credentials (these should be marked on the router itself unless you've changed them). Go to the VPN tab — which should be there if it's a router with VPN firmware — and upload the profile you downloaded from the VPN website. Use the same router control panel to activate and deactivate the router VPN connection.
This article originally appeared on Engadget at https://www.engadget.com/cybersecurity/vpn/how-to-use-a-vpn-140000564.html?src=rss
Source link